
01Screen layout
This is the screen after a DXF is open. There are six areas to know.
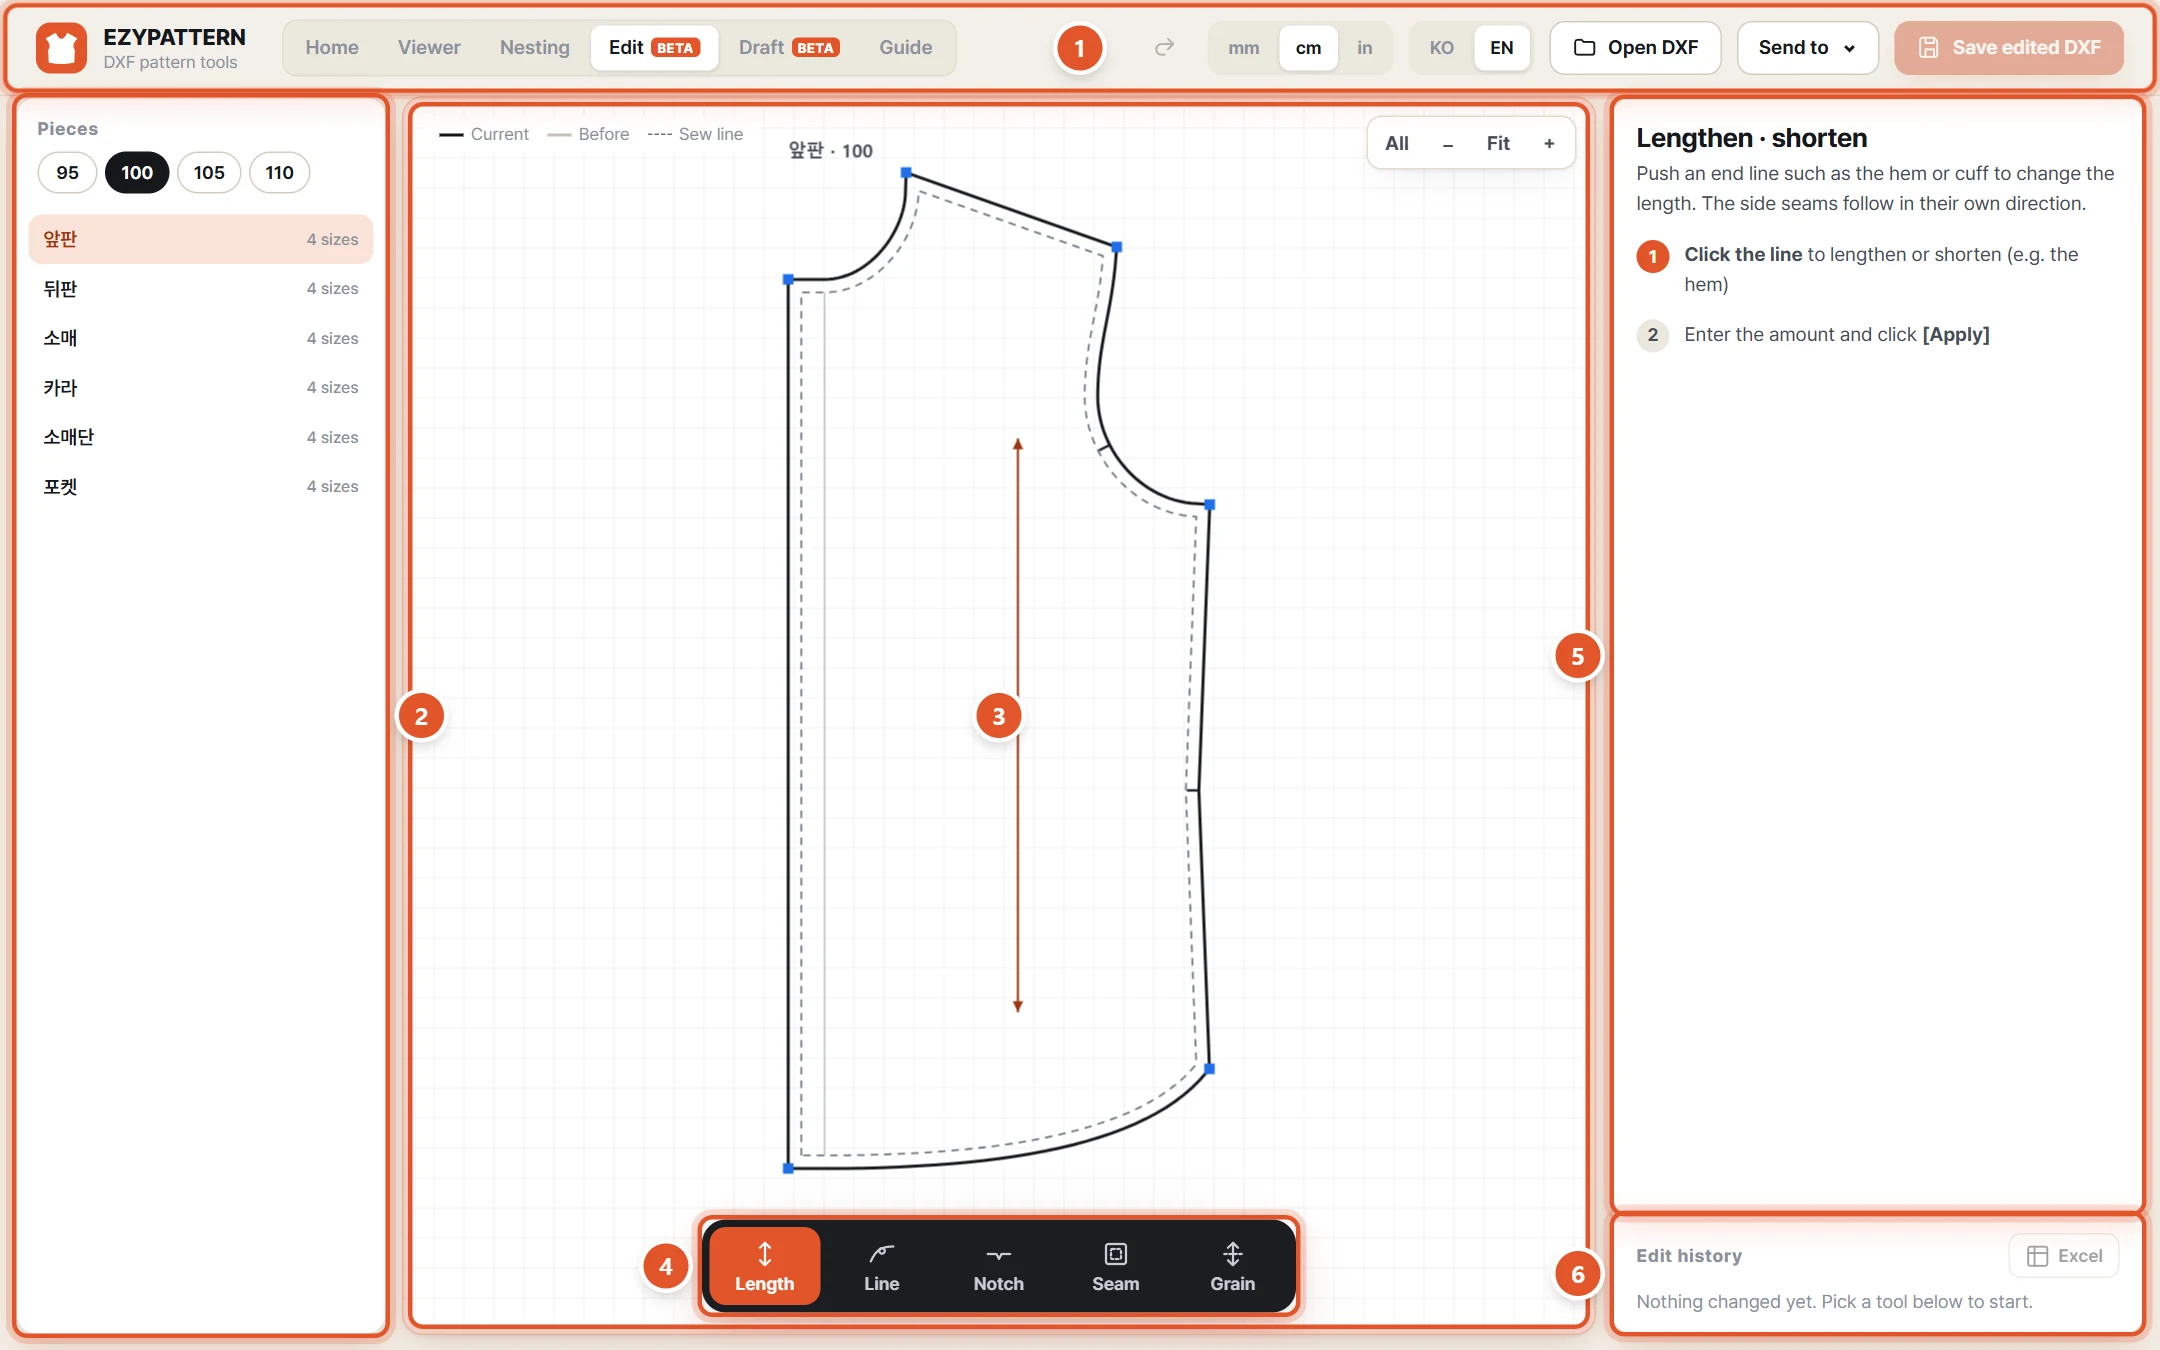
- Top bar — Undo and Redo, length units (mm · cm · in), the KO · EN switch, Open DXF, the Open in menu and Save edited DXF.
- Pieces — the size chips (95 · 100 …) and the piece list. Pick the piece and size to edit here.
- Drawing — the large area in the middle. The black line is the current line, the pale grey one is before, and the dashed line is the sew line. Click the spot to fix right on the drawing.
- Tool bar — Length · Line · Notch · Seam · Grain below the drawing. Pick one and the right panel switches to it.
- Work panel — top right. It tells you what to do in steps 1 → 2, then you enter the amount and click Apply.
- Edit history — bottom right. Every edit you apply is listed line by line.
02Open a DXF file
Load your pattern file. It is processed inside your browser only and is never uploaded.
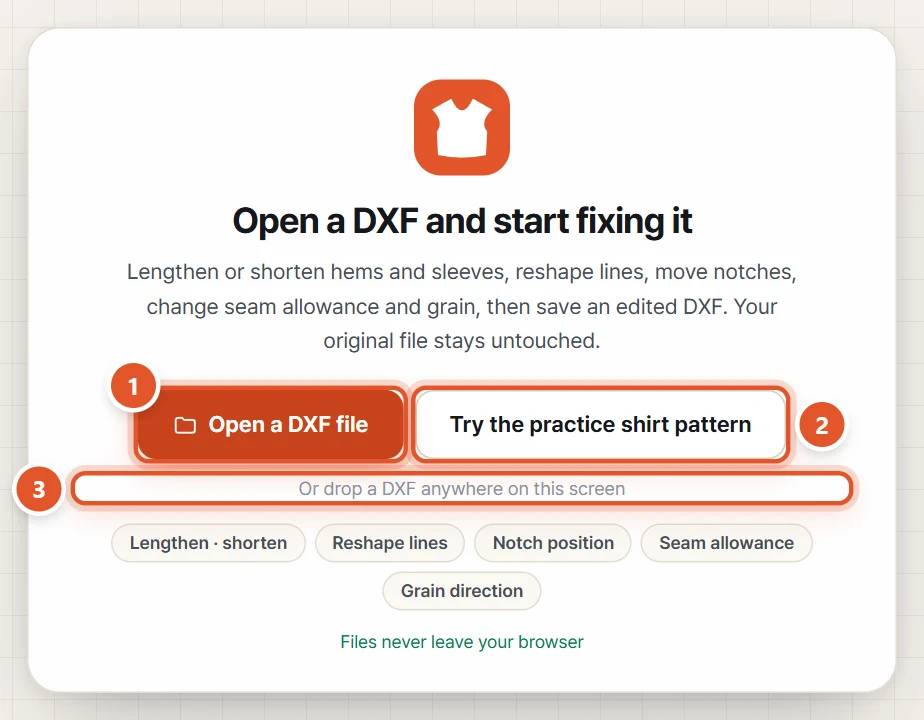

- On the start screen click Open a DXF file and choose your DXF. The Open DXF button at the top works too.
- Or drag the DXF file and drop it anywhere on this screen.
- To practise first, click Try the practice T-shirt pattern. The pictures in this guide were taken with the earlier practice shirt pattern.
- Once it opens, the file name appears at the top (e.g. ezypattern-sample-shirt · 24 pieces) and the first piece is shown on the drawing.
TipPattern Edit never changes your original file. At the end, Save edited DXF downloads a new file with _edited added to the name.
03Choose a piece and size
You edit one piece in one size at a time, shown large on the drawing.
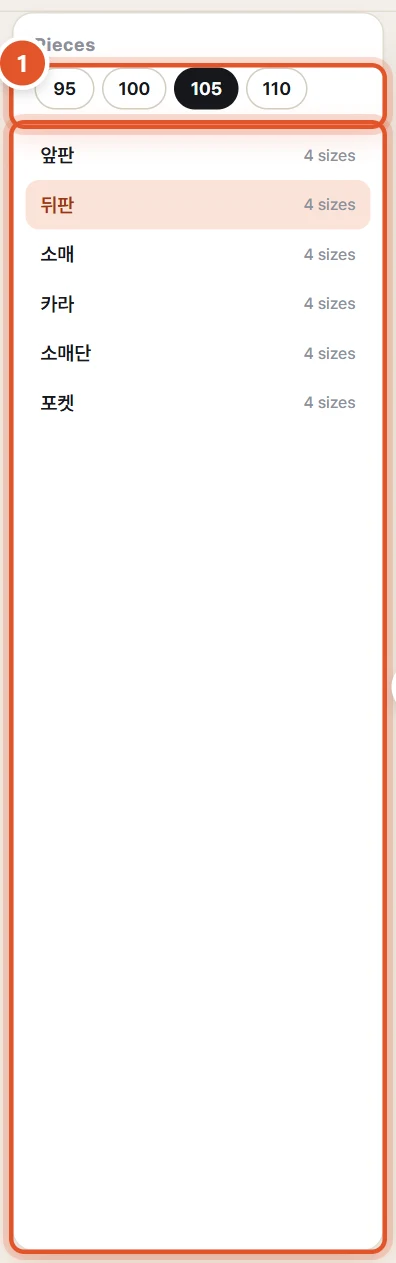
- Pick a size from the chips at the top left (95 · 100 · 105 · 110).
- Click a piece name in the list (Front · Back · Sleeve …). The drawing switches to that piece.
- All at the top right of the drawing shows every piece together; click another piece to edit it. Fit and − + zoom in and out.
- Right-click a piece in the list for Rename (F2), Zoom to this piece, Show this piece only and Reset this piece.
TipA new name is written into the PIECE NAME of the DXF when you save.
04Lengthen or shorten
Push an end line such as the hem or cuff to change the length. The side seams follow in their own direction.
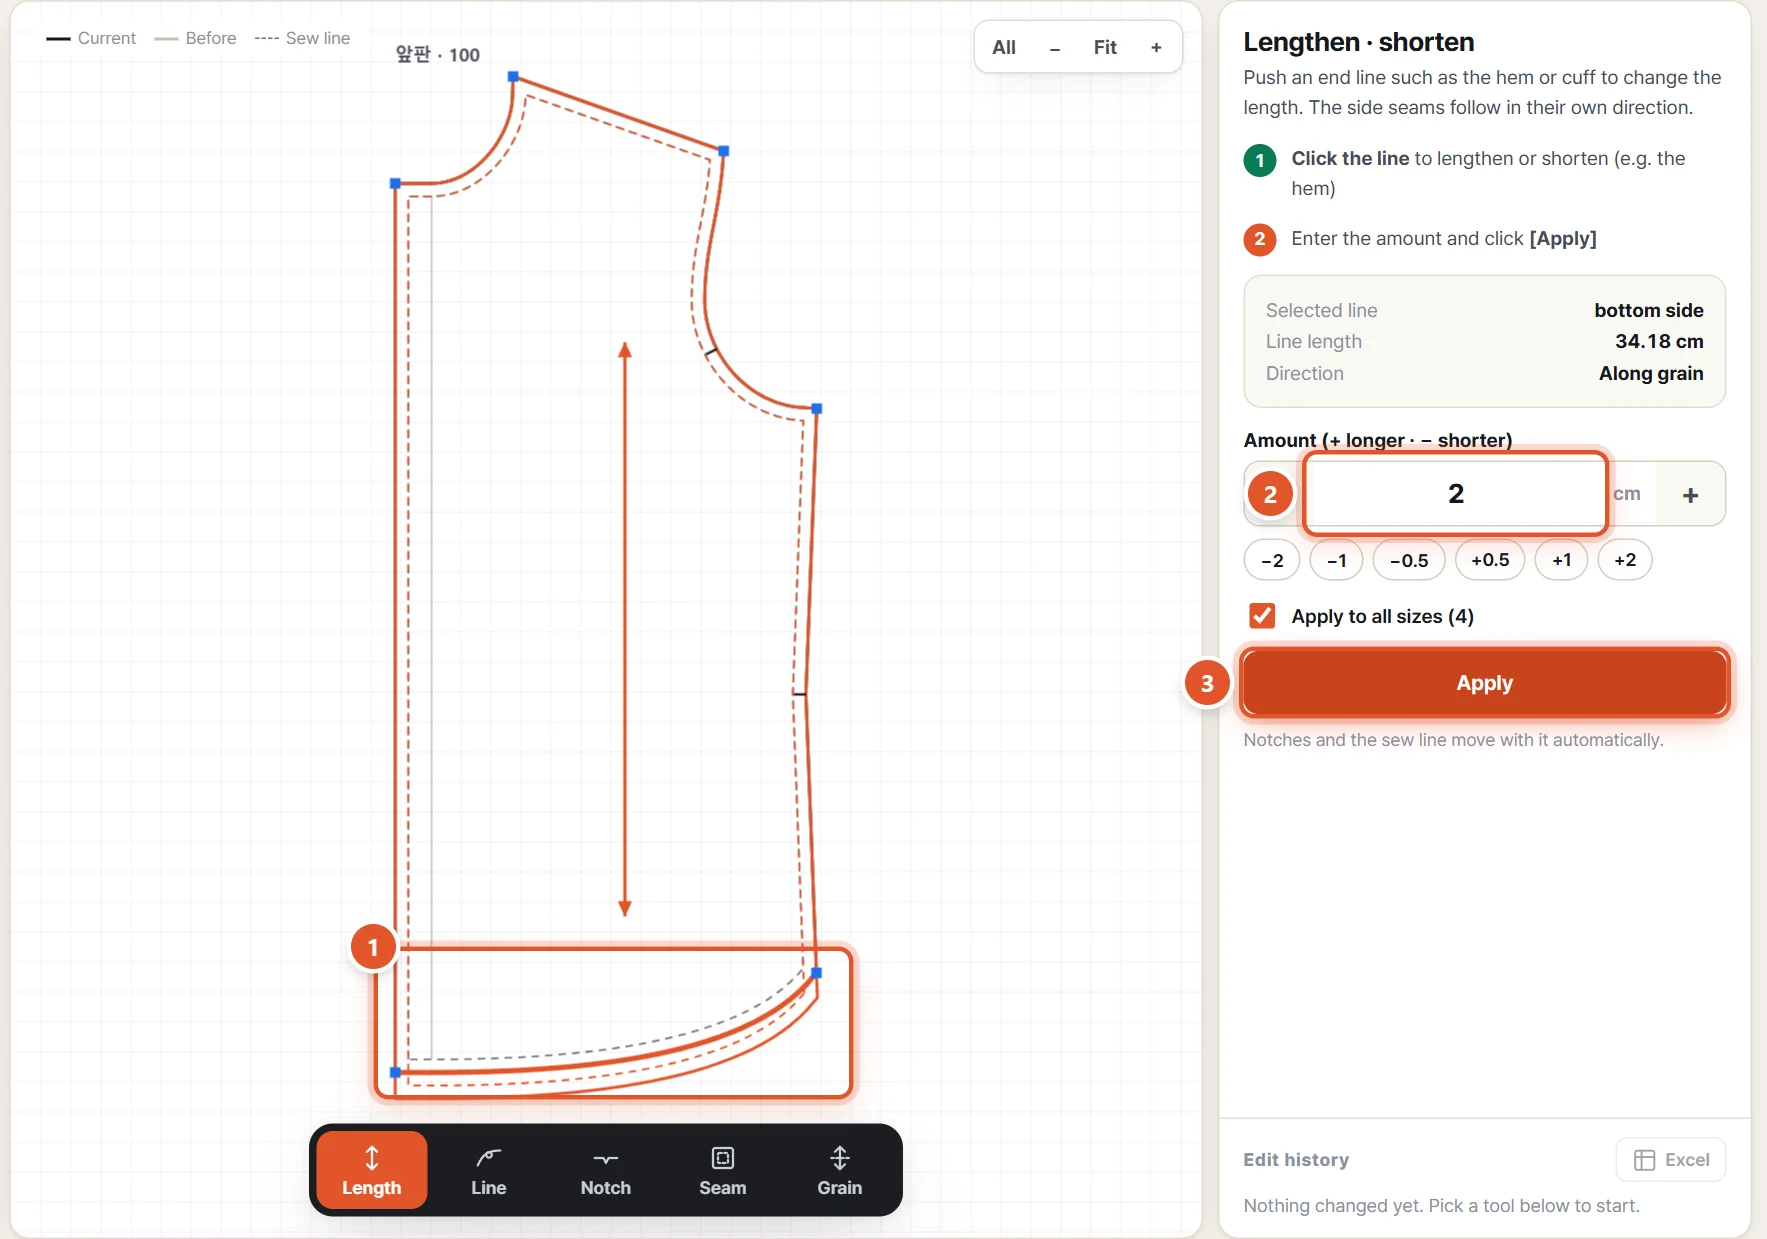
- Choose Length on the tool bar.
- Click the line on the drawing that you want to lengthen or shorten (e.g. the hem). It turns orange and the panel shows its name, length and push direction.
- Type a number in the Amount box or use −2 −1 −0.5 +0.5 +1 +2. + lengthens, − shortens. The new shape is previewed on the drawing.
- While Apply to all sizes is on, the same edit is applied to every size. Turn it off to change this size only.
- Click Apply. Notches and the sew line (dashed) move along automatically.
TipThe old shape stays as a pale grey line, so you can see right away how much changed.
05Edit history and undo
Every edit you apply is recorded, and you can undo it at any time.
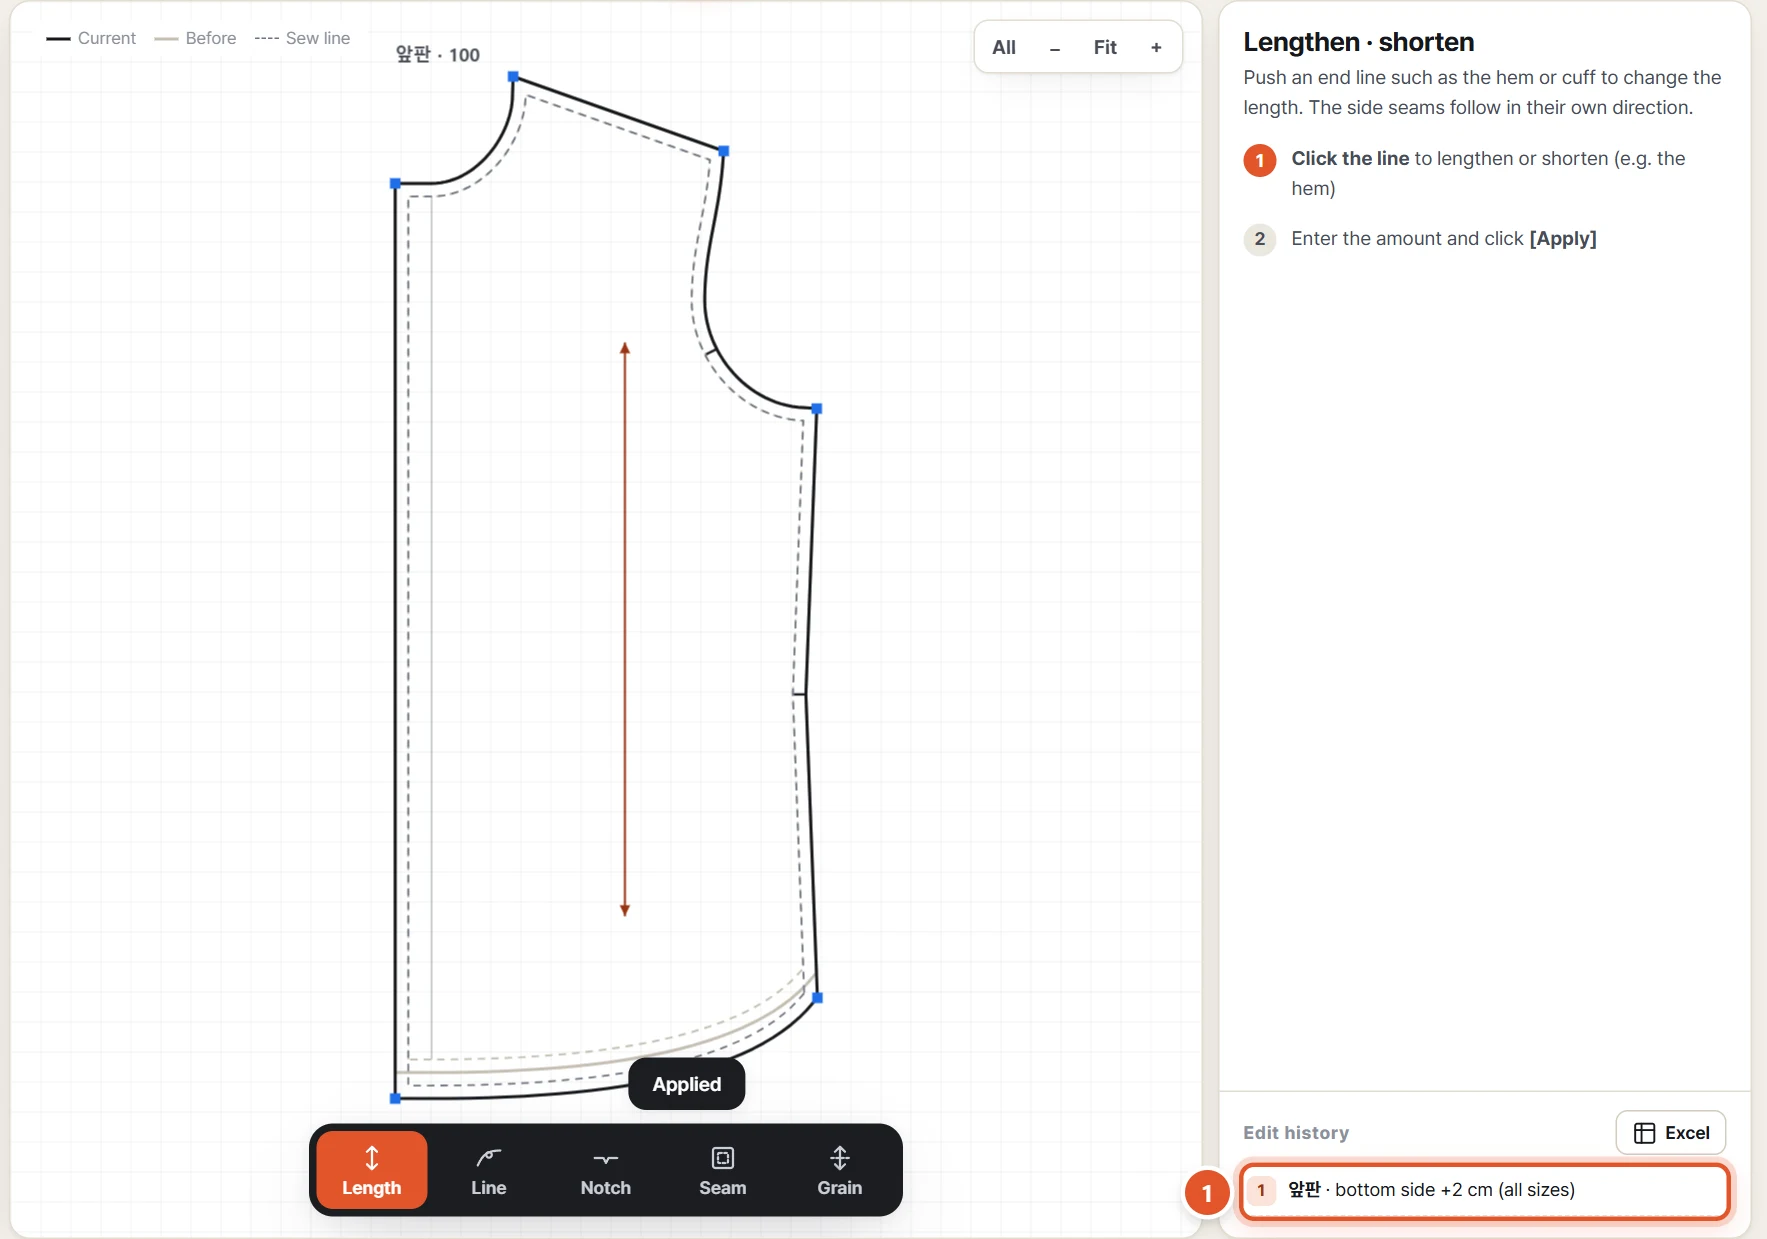
- After Apply, a line such as "Front · bottom side +2 cm (all sizes)" is added to Edit history at the bottom right.
- Undo (Ctrl+Z) and Redo (Ctrl+Y) at the top step back and forward one edit at a time.
- To reset one whole piece, right-click it in the list → Reset this piece.
- Excel downloads the history (No. · Piece · Size · Change) as an Excel file — handy for a work order.
- If an edit could not be applied to some sizes, the history says which ones were left out (e.g. "— size 95 not changed").
06Reshape a line
Move a point and the line bends smoothly to the corners on each side. Moving a corner (blue) moves the lines joined to it.
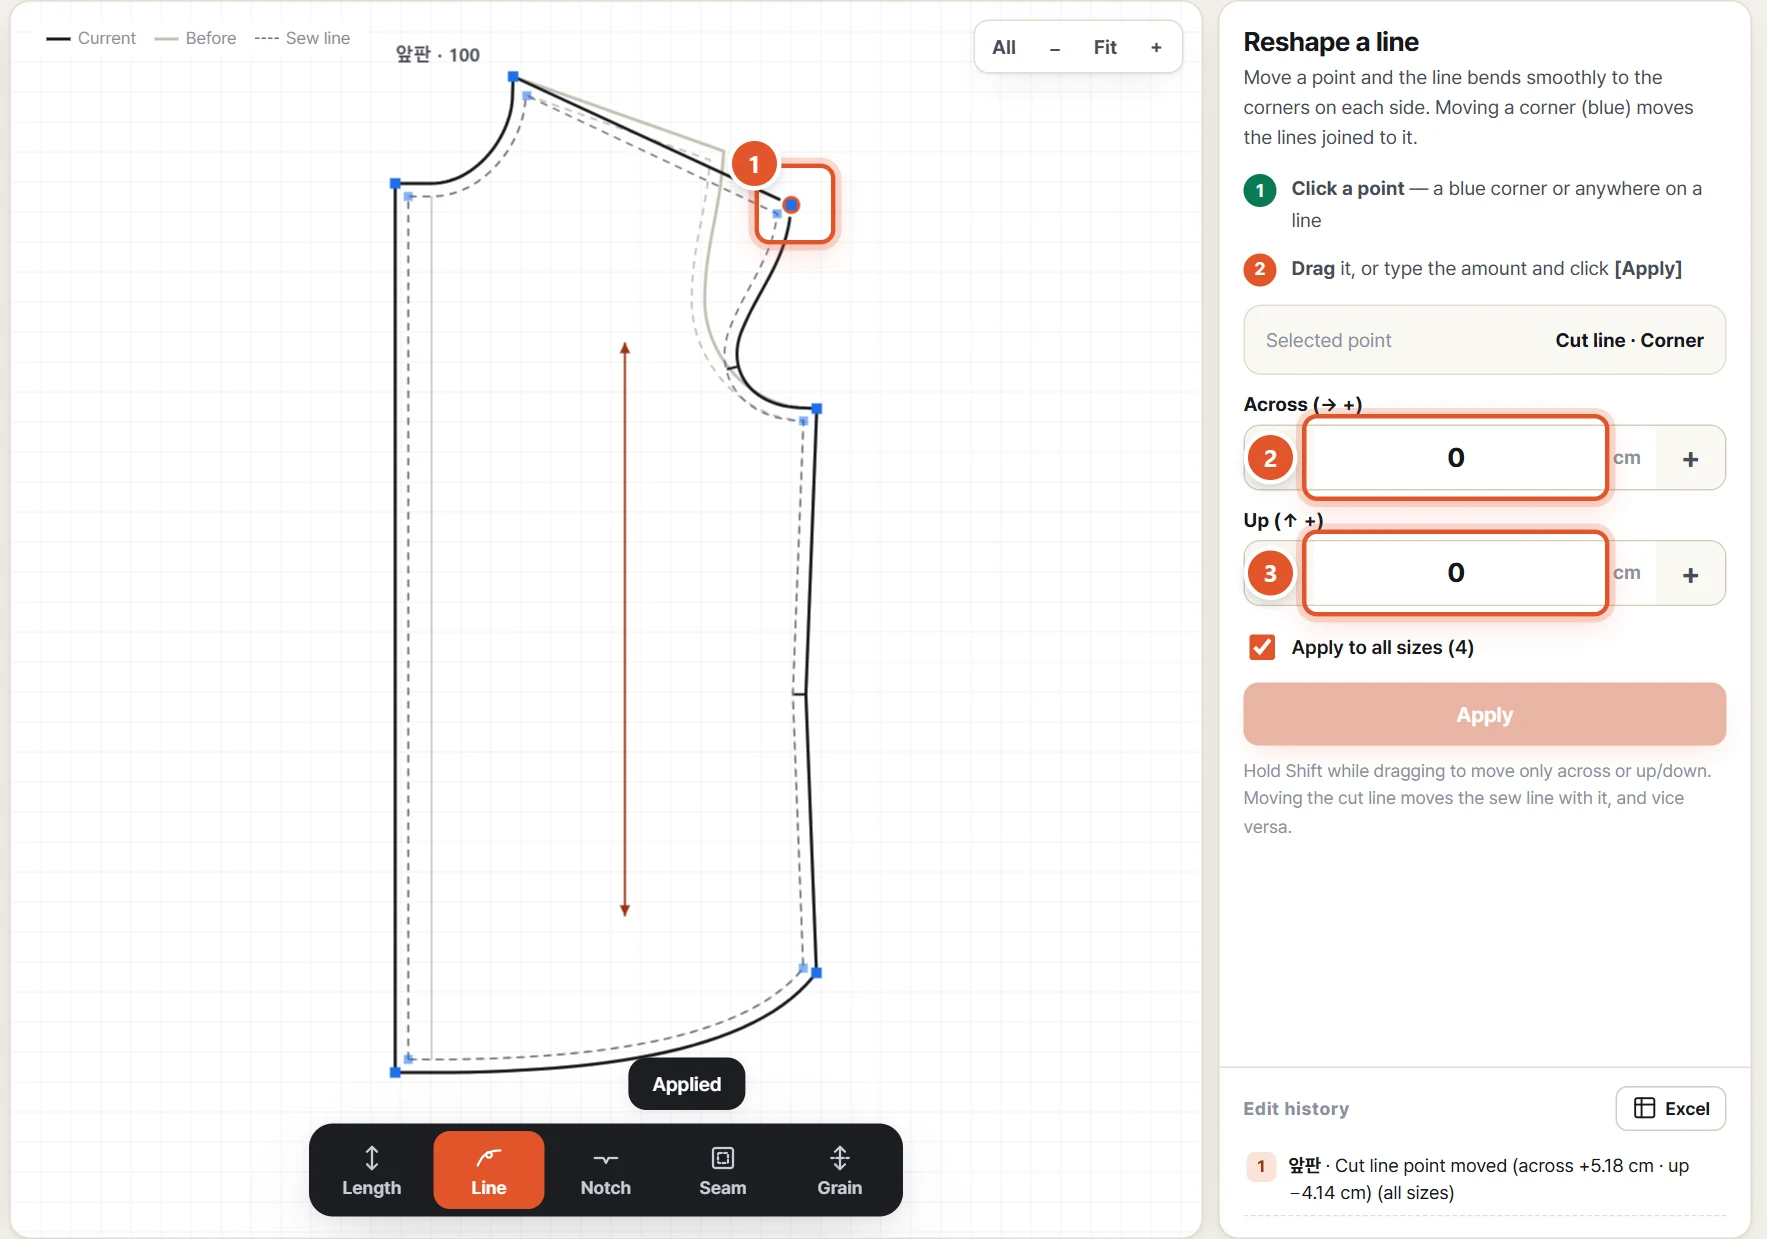
- Choose Line on the tool bar.
- Click the point to move — a blue corner or anywhere on a line.
- Drag it on the drawing. Hold Shift to move only across or up/down. Releasing the mouse applies it right away.
- For exact amounts, type cm into Across and Up on the right and click Apply. Across → is +, up ↑ is +.
TipMoving the cut line moves the sew line with it, and vice versa. The pale grey line is the shape before editing.
07Notch position
Move notches along the line, add new ones, or delete them.
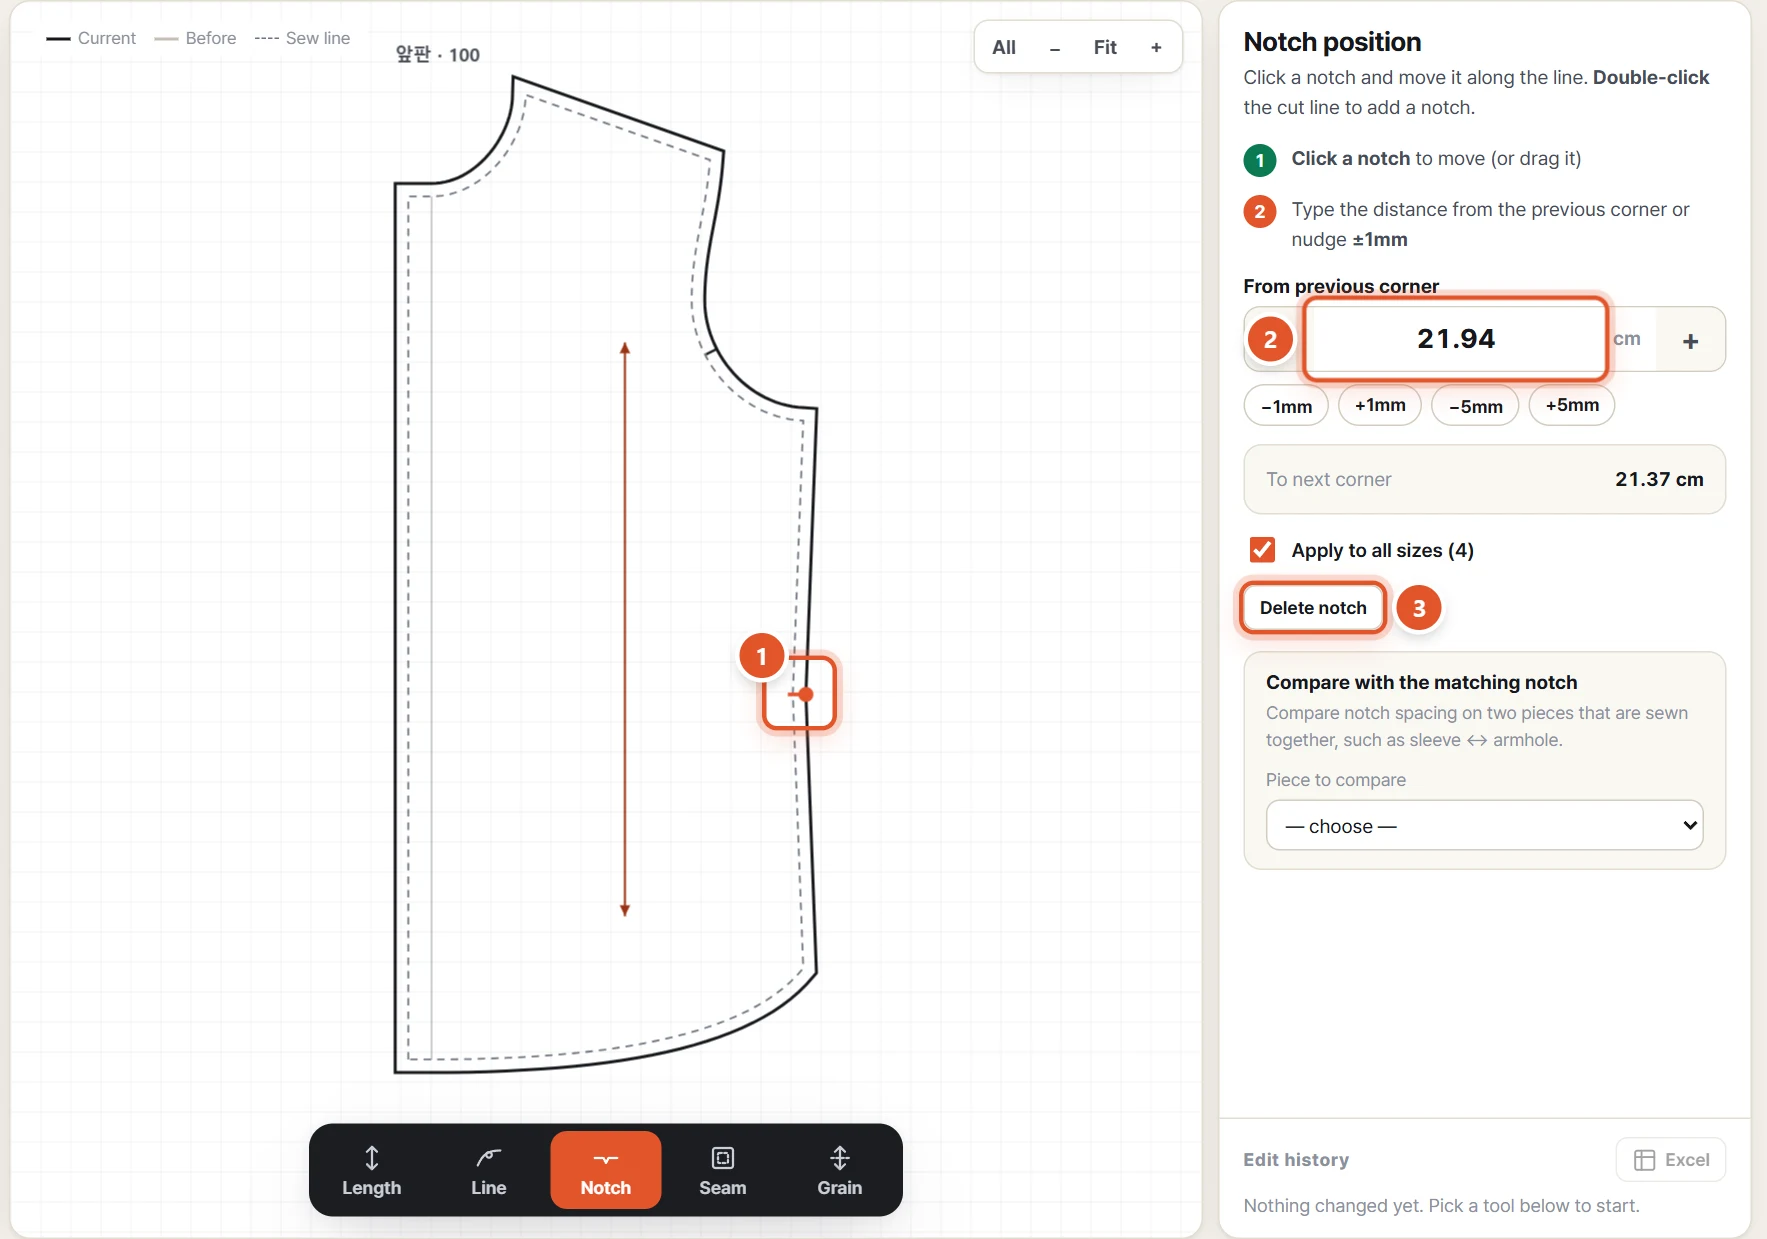
- Choose Notch on the tool bar.
- Click the notch to move. You can also drag it.
- Type the distance (cm) in From previous corner or nudge with −1mm +1mm −5mm +5mm, then Apply. To next corner is shown below.
- Double-click the cut line to add a notch. To delete one, select it and click Delete notch or press Delete.
TipFor two pieces that are sewn together, such as sleeve ↔ armhole, choose the piece under Compare with the matching notch and click the matching notch on the piece shown on the right — the Difference in spacing appears as a number, and Match this notch to it aligns them.
08Seam allowance
Change the width from the sew line (dashed) to the cut line. Only the selected side changes.
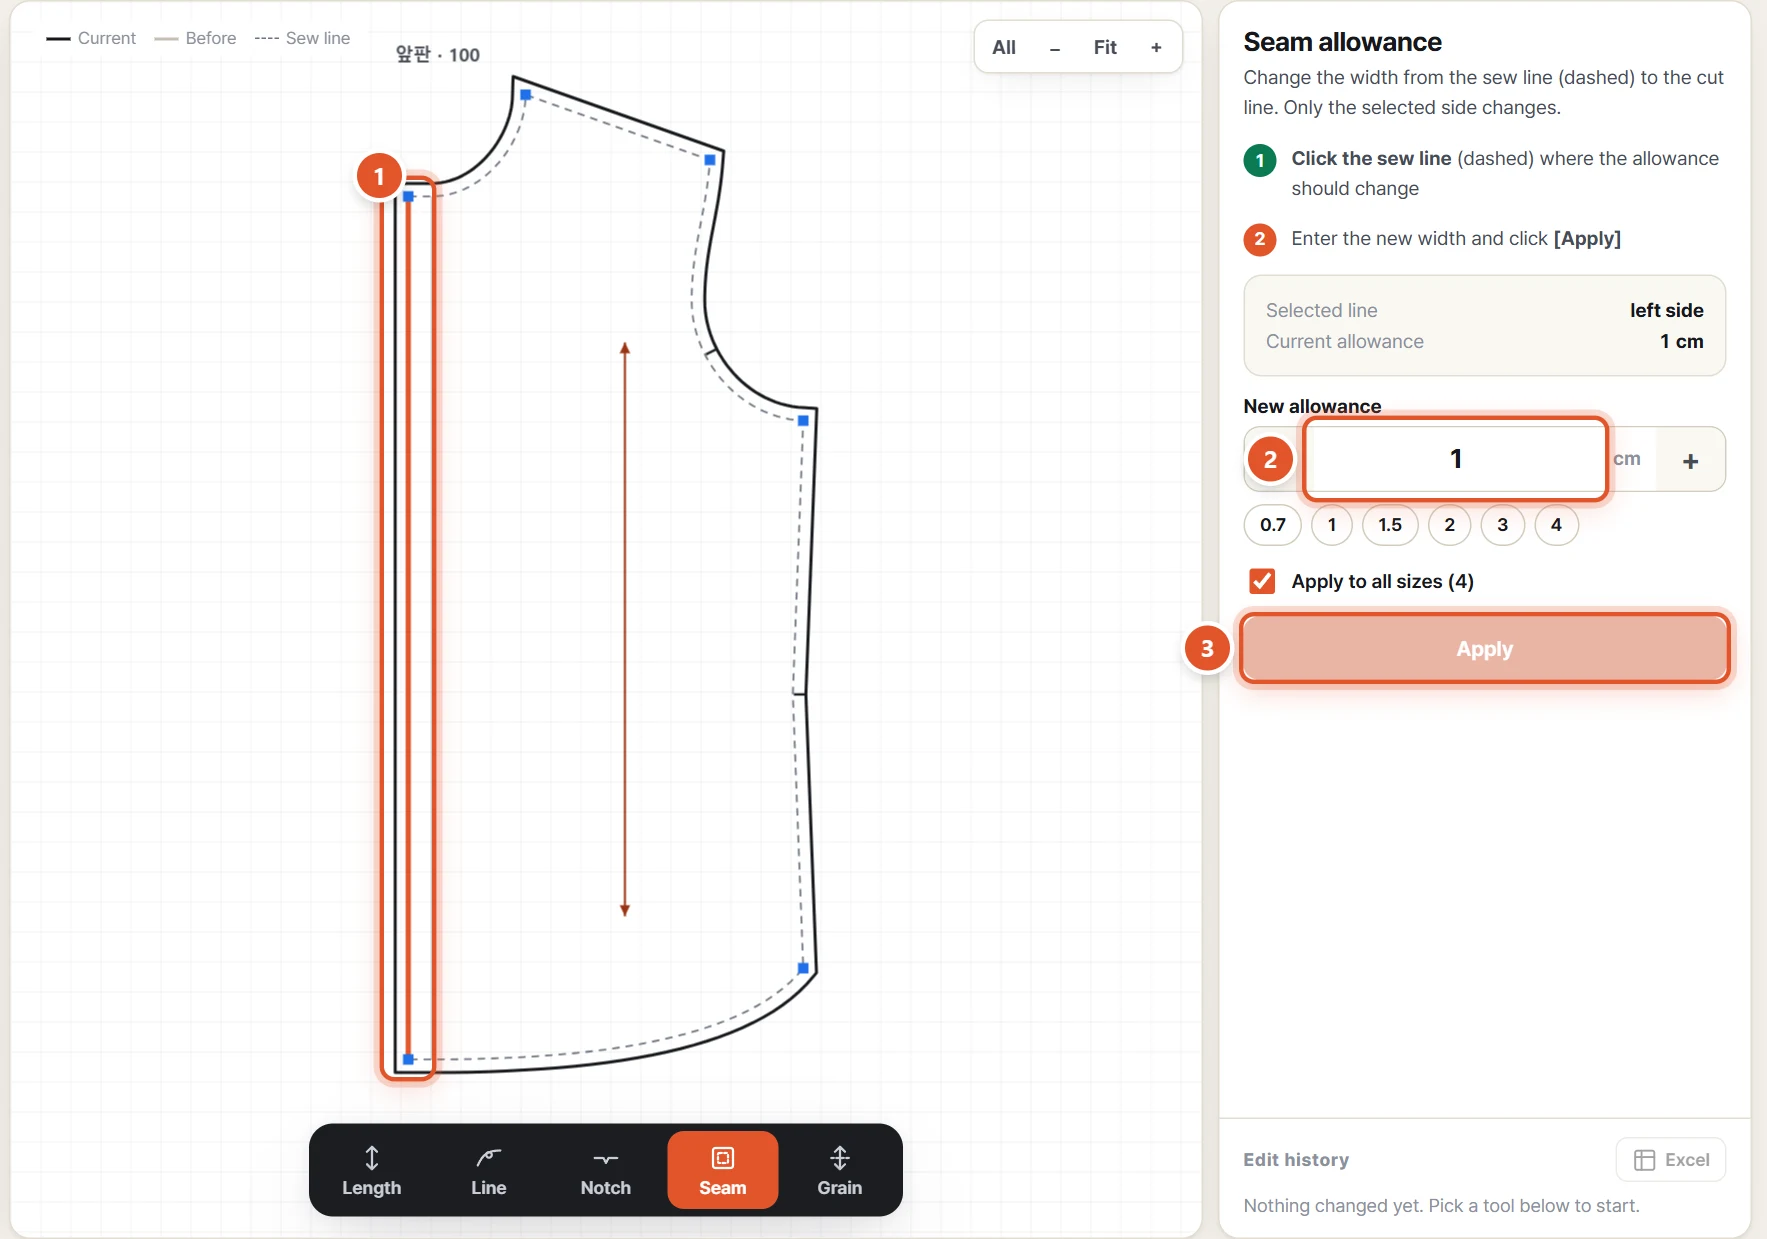
- Choose Seam on the tool bar.
- Click the sew line (dashed) where the allowance should change. It turns orange and the Current allowance is shown.
- Type the width (cm) in New allowance or click one of the 0.7 · 1 · 1.5 · 2 · 3 · 4 chips. The new cut line is previewed on the drawing.
- Click Apply.
NoteIf the line would cross itself or that width cannot be reached, the tool says the width cannot be applied and changes nothing — try another width. For patterns whose sew line is drawn in pieces, change one sew-line segment at a time.
09Grain direction
Rotate the grain line (the arrow). Marker Nesting places pieces along this direction.
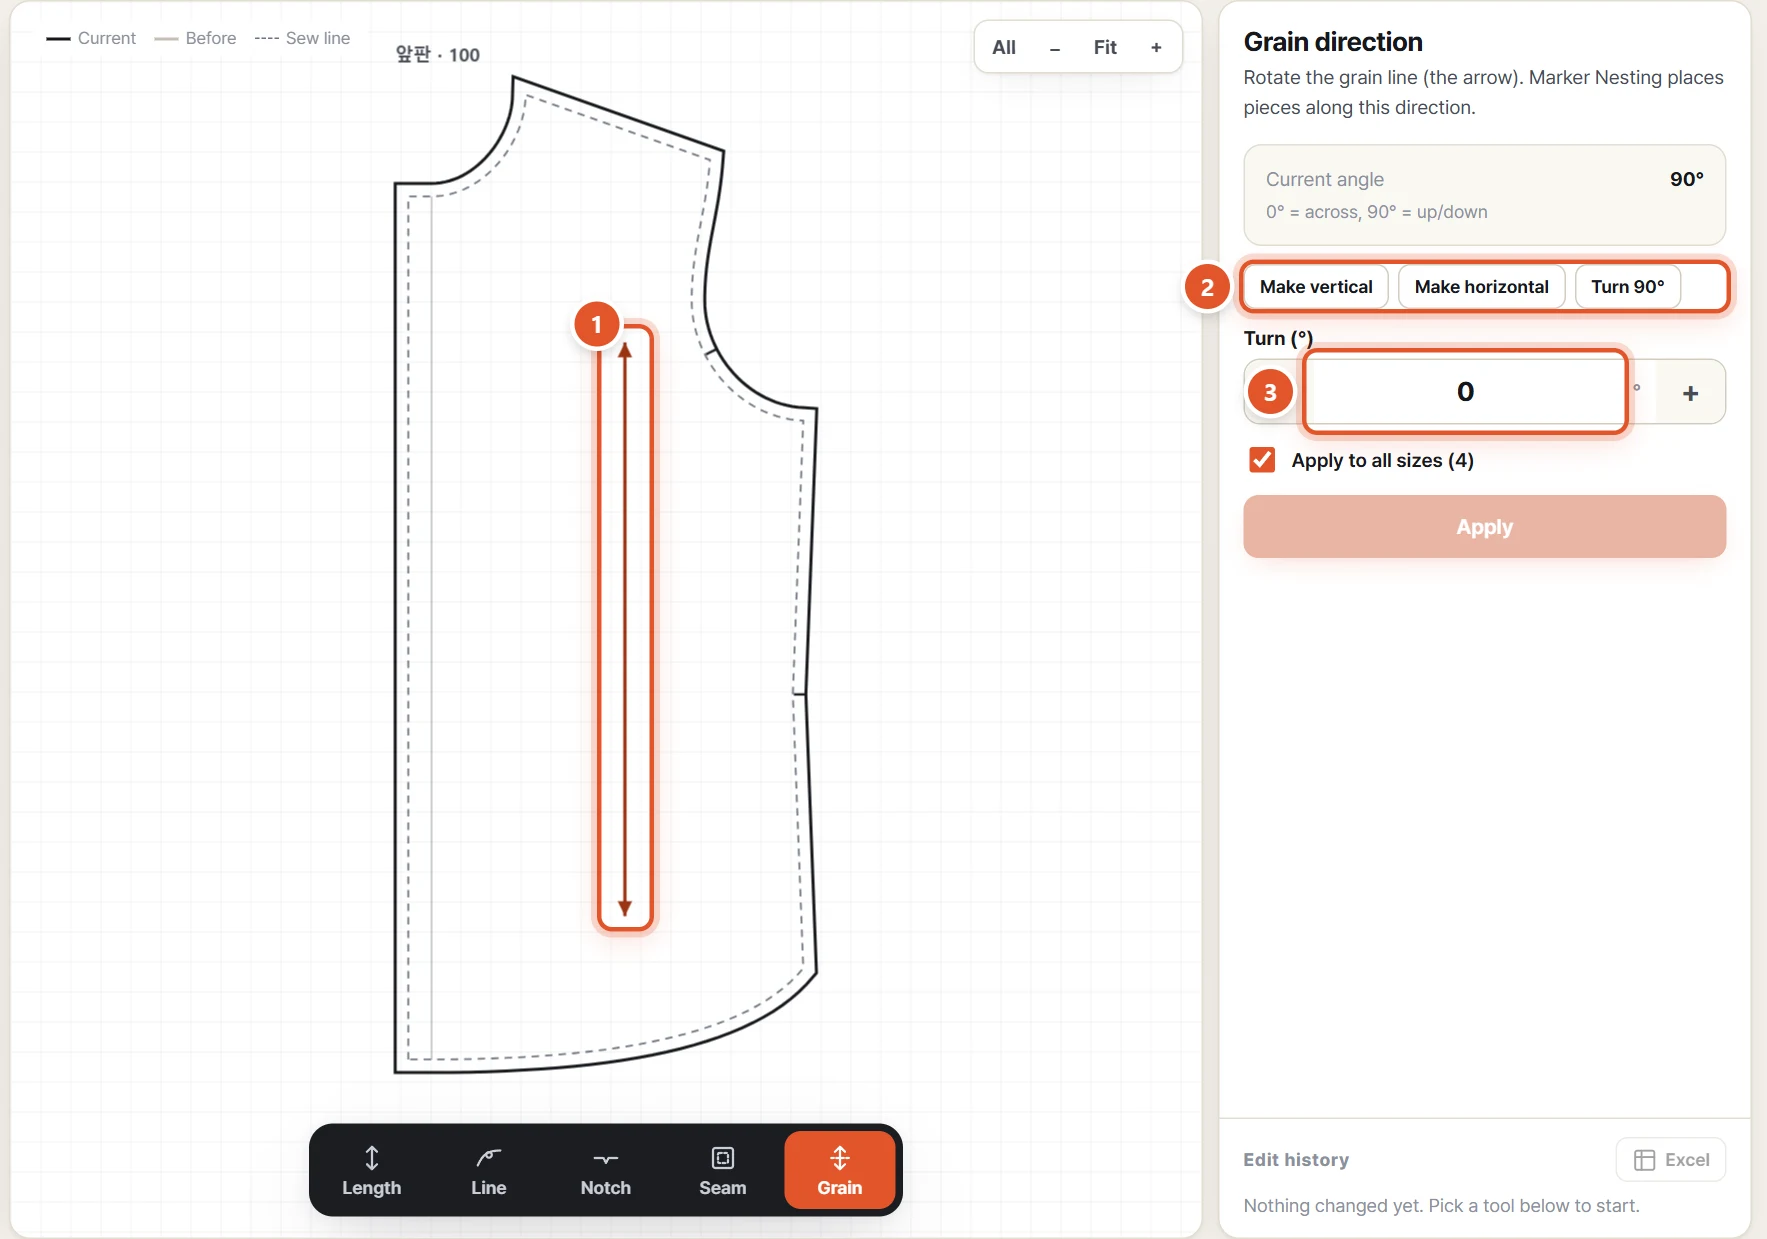
- Choose Grain on the tool bar. The current angle is shown (0° = across, 90° = up/down).
- Click Make vertical, Make horizontal or Turn 90°, or type an angle in Turn (°).
- Click Apply. The grain arrow turns to the new direction.
TipA grain line drawn in several segments turns as one, all at the same angle. A piece without a grain line shows "This piece has no grain line."
10Save and open in other tools
Save the edited pattern as a DXF, or open it straight in another tool without saving.

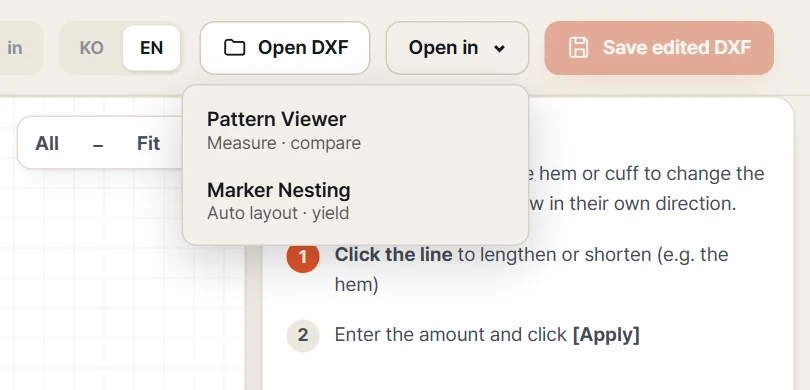
- Click Save edited DXF (Ctrl+S) at the top right. The button is greyed out until something is changed.
- Only the pieces you edited change; untouched pieces are saved as they were. _edited is added to the file name.
- Switch the unit used for numbers with mm · cm · in at the top. Input boxes, buttons and the edit history all follow it.
- Open in ▾ opens the pattern right away in Pattern Viewer (measure · compare) or Marker Nesting (auto-nest · yardage) in the same tab. The file is held only inside your browser for a moment and is never sent to a server.
NoteIf you leave or close the page with unsaved edits, you are asked "You have unsaved edits. Leave anyway?"
11Keyboard shortcuts
| Ctrl + Z | Undo |
| Ctrl + Y | Redo (Ctrl+Shift+Z also works) |
| Ctrl + S | Save edited DXF |
| F2 | Rename the current piece |
| Enter | Apply from a number box |
| Shift | While dragging with the Line tool, move only across or up/down |
| Delete | Delete the selected notch with the Notch tool |
| Esc | Clear the selection · close a menu |
12FAQ
- Is my file uploaded to a server?
- No. Reading, editing and saving the DXF all happen inside this browser.
- Does it change my original file?
- No. Save edited DXF downloads a new file with _edited added to the name. The original is untouched.
- I want to edit only one size.
- Turn off Apply to all sizes in the work panel and click Apply. Only the size shown on the drawing changes.
- It says "the same spot was not found".
- When applying to all sizes, some sizes do not have the same line, point or notch, so those sizes were left as they are. The history shows which ones. Pick those sizes and edit them separately.
- It says the line "would cross itself or the width could not be reached".
- When the new value would make the cut line cross itself, or the allowance cannot be built, the tool stops safely. Try a smaller change or another width.
- Can I use it on a phone?
- It is laid out for a PC screen. Below 900 px wide a notice appears; you can continue, but buttons such as Save may be cut off.
Done reading? Open it and try.